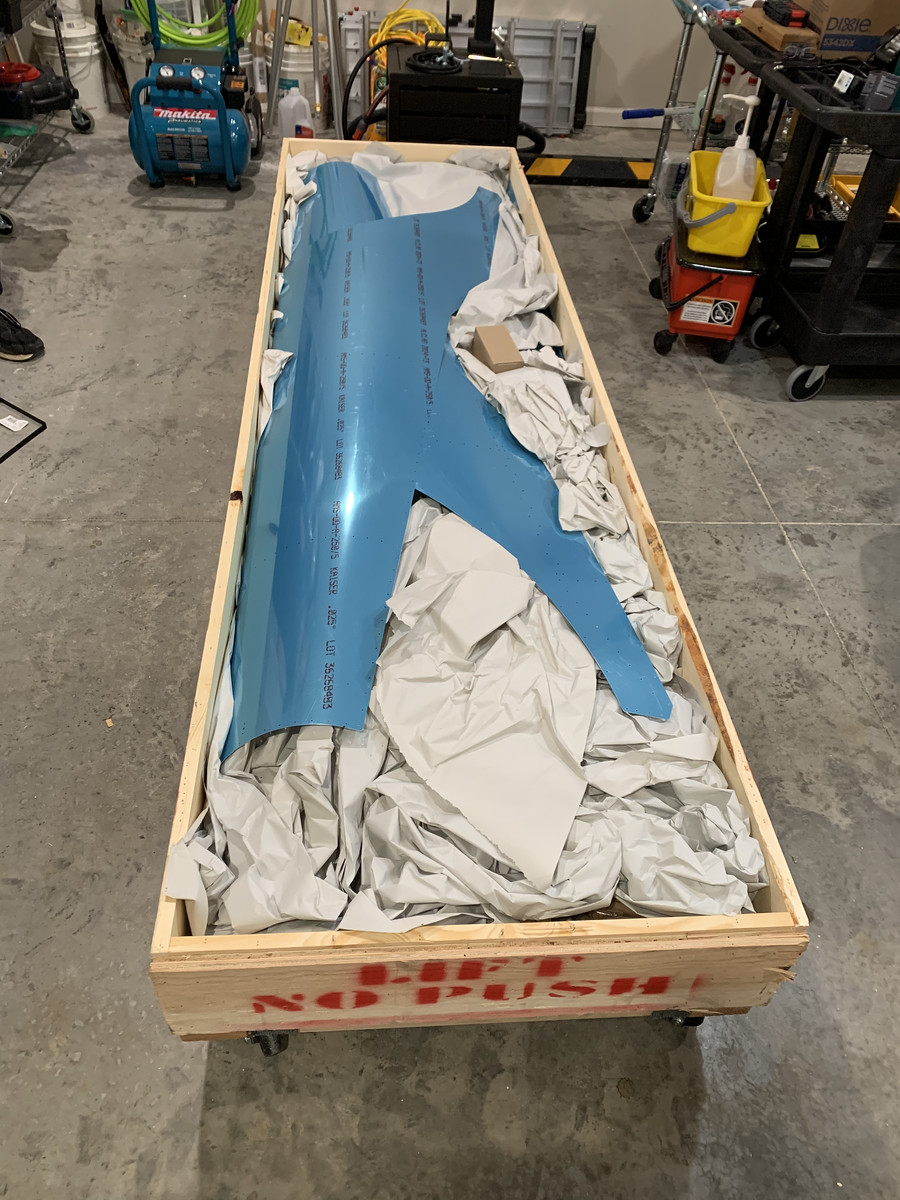
Sooooooo… I ordered a thing today:

4 Likes
Some more airplane porn – this is what all those parts will end up looking like!


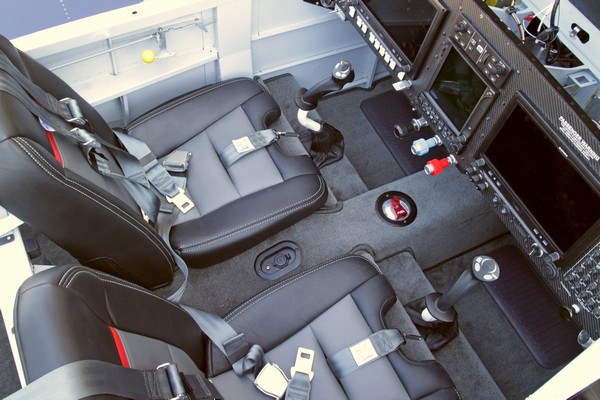
I love the paint scheme on this guy’s plane, and I love this interior!
1 Like
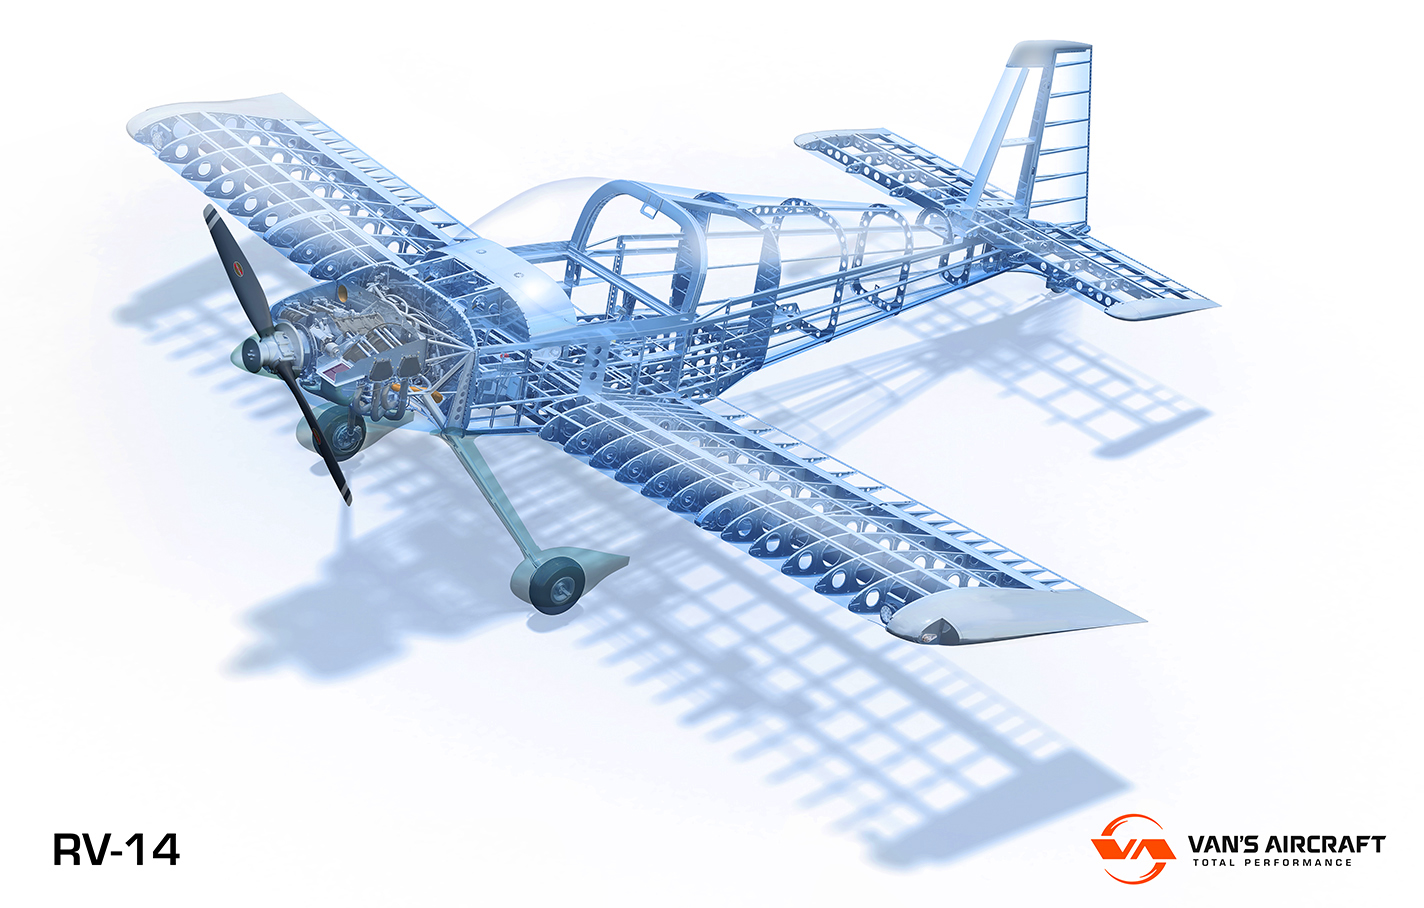
Here’s a look at what all those parts look like when they’re assembled – if you could see through the skin of the aircraft  The kit manufacturer is Van’s Aircraft, and there are numerous models to choose from. I chose the RV-14 – a side-by-side two-seater – because it fits the type of flying I will do 99% of the time: flying somewhere – fast (the RV-14 cruises at over 200 mph) – either solo or with a friend.
The kit is built in 4 stages:
- the empennage (the tail and the aft-most part of the fuselage)
- the wings
- the fuselage
- everything forward of the firewall (the engine, prop, etc.)
I’ve ordered the empennage kit, and it should be here in a few weeks. I expect that it will take several months to complete it, especially since I have to acquire a lot of tools and set up a shop in my garage in which to build the plane! 
Because the wings and fuselage involve a LOT of repetitive assembly, they generally take a very long time to complete. Van’s offers a great way to cut that time by 30-40% through what they call a “QuickBuild kit” – the wings and fuselage are mostly complete when they arrive at your door! (The QuickBuild wings and fuselage are shown in the kit photo in the first post above.)
Some (most? all?) of you might be wondering why anyone would build a kit plane. There are myriad reasons people do this, but for me, there are several reasons:
- no certified airplane fits my needs as well as the RV-14 does
- I can customize this plane as it’s built – and even afterwards – much more easily (and much more extensively) than can be done with a certified airplane
- I can equip the RV-14 with the latest avionics for a fraction of the cost of installing similar equipment in a certified aircraft
- I can spread the total cost of the airplane out over time, making it easier to fit into my budget
- building an airplane is a lot of fun and a lot of work and sometimes frustrating
If you’re wondering whether it’s less expensive to build than to just go out and buy an airplane – it’s not, in general. You can probably save money, in fact, by buying the same airplane that someone else already finished. However, you give up the satisfaction of having built it yourself and also you’re choosing to accept someone else’s solutions to the thousands of small choices you make when building.
1 Like
As you might imagine, building an airplane requires some tools the average person isn’t likely to have in their home workshop. All of Van’s airplanes are constructed out of metal, the way most airplanes have been built for decades.
Aside - composite construction
That’s changing, however: almost all new commercial designs – and many new experimental/amateur-built ones as well – are constructed at least in part from composites: fiberglass and carbon fiber, for instance. The problem with composites is that they are much more complex and difficult to work with. Very few composite aircraft are constructed at home – most are built at a “builder assist center,” where paid professionals help you build your aircraft. To me, this (1) violates the spirit of the FAA regulations governing experimental/amateur-built aircraft, and (2) is quite expensive.
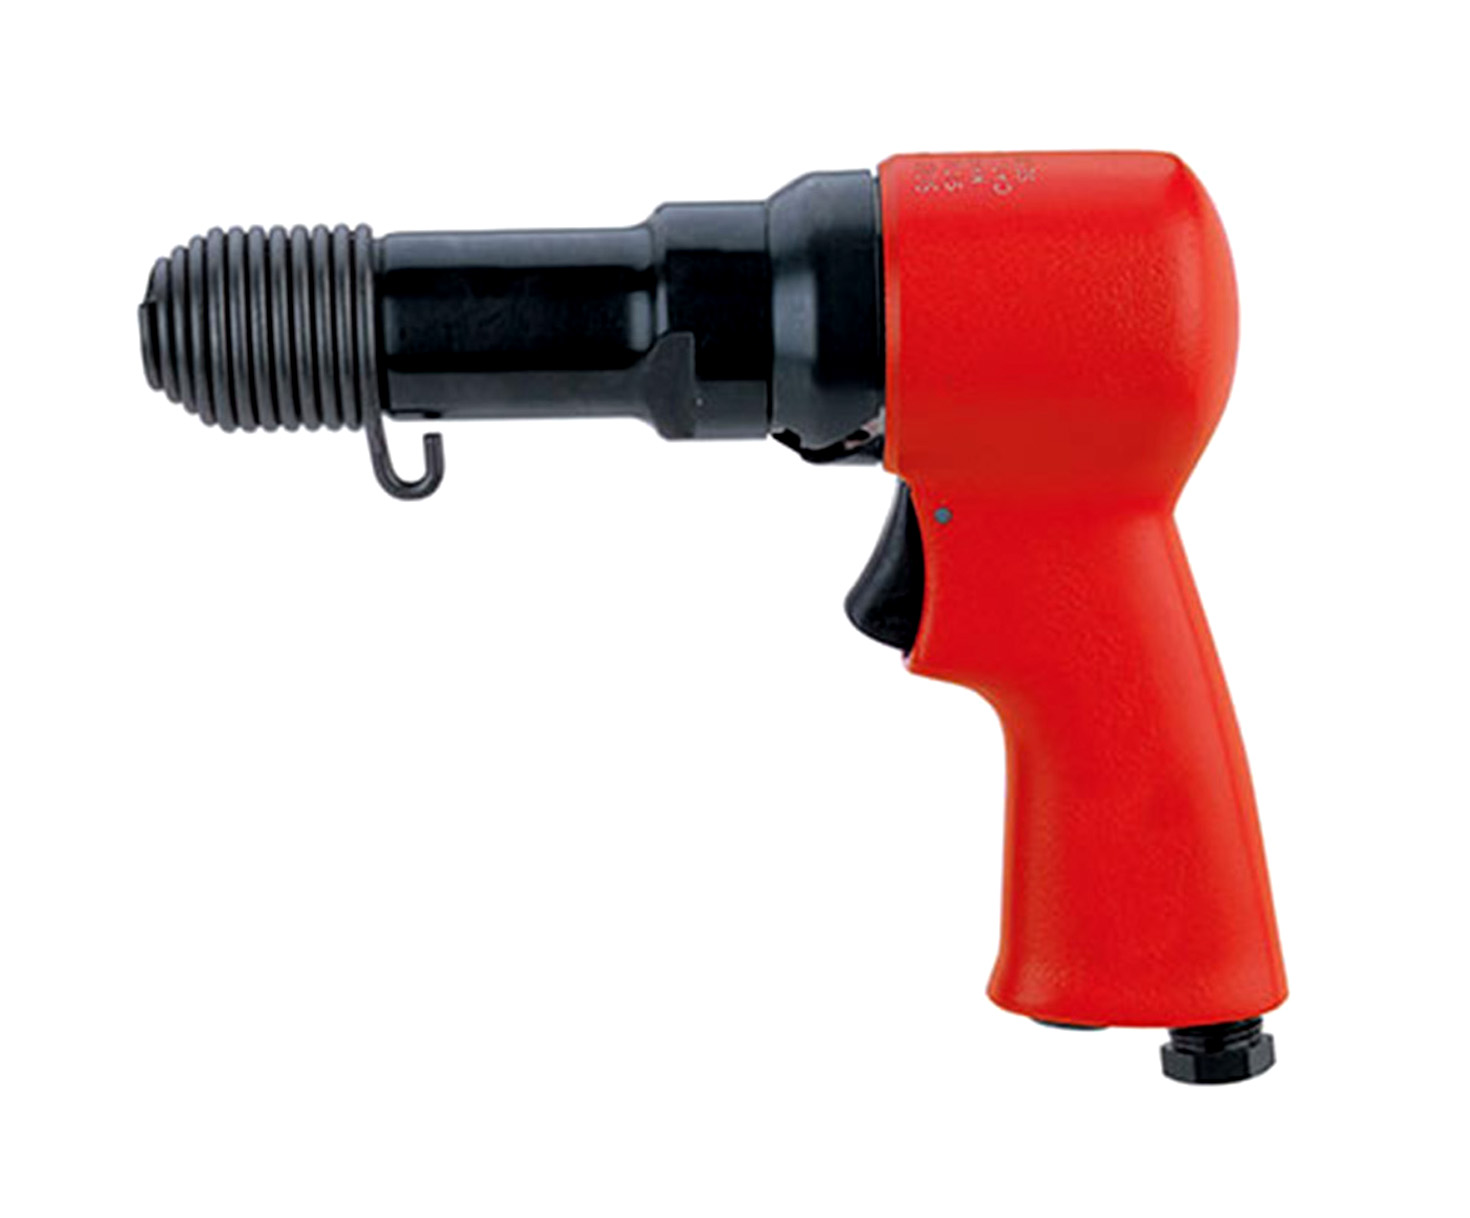
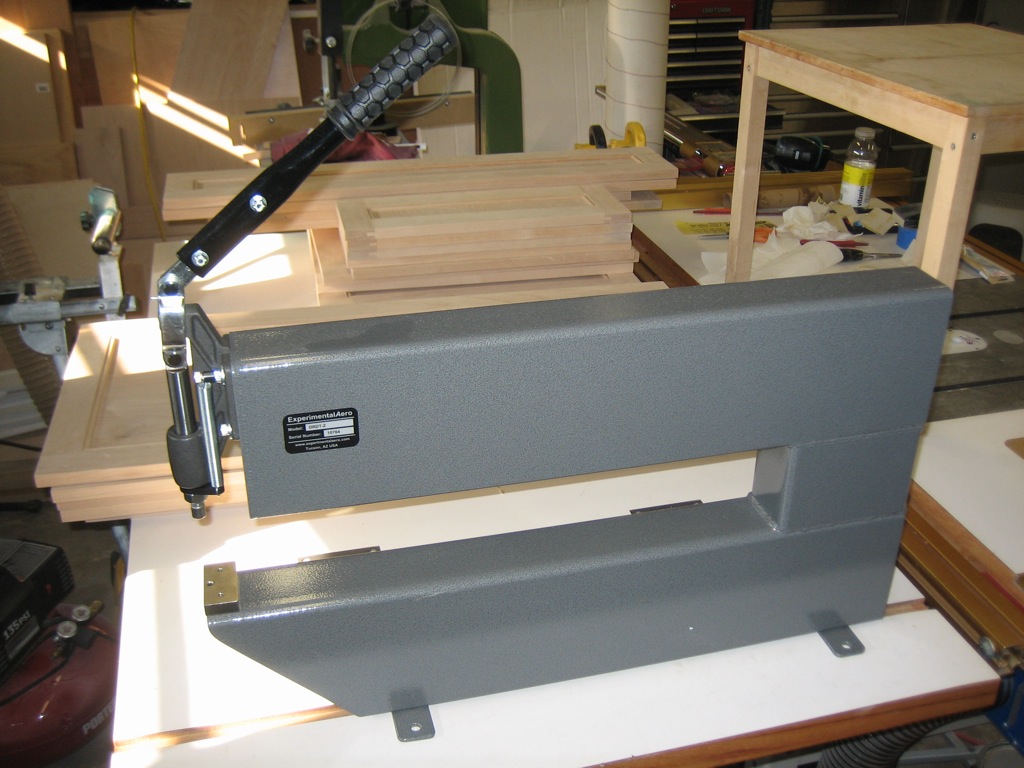
Fortunately, because the tools are easy to obtain from a number of aviation suppliers – after all, there are a lot of commercially constructed aircraft out there made out of metal, and they need to be repaired and maintained! While I’m waiting for the empennage kit to arrive, I’ve started collecting some of the tools I’ll need. In addition to a pneumatic drill (lightweight, spins VERY fast, which is good for aluminum), I’ve ordered a riveting gun and a sheet metal dimpler, which is a device which makes a precise depression in a sheet of aluminum to allow a rivet to sit flush with the surface – much like a countersink bit does in thicker materials. Here’s what those two items look like:
Sioux 270A 3X Rivet Gun
ExperimentalAero DRDT-2 Dimpler
1 Like
Okay, can I say that I totally have a outdated image of what a plane dashboard looks like, I was expecting a bunch of gadgets and small switches n stuff when I took a closer look at the interior image. (Bigger commercial airplane probably have that same old dashboard look and Im just using that image to apply it to my expectation for a smaller plane- ) But damn does his interior look so nice/sleek ![]()
1 Like
Yah, aircraft instrument panels look really different nowadays, as the old analog “steam gauges” have been replaced by computer screens, creating the so-called “glass cockpits” of today. Here’s an example. The first photo shows a typical Cessna 172 panel, very much like the one in which I took my first flight lesson 30 years ago:
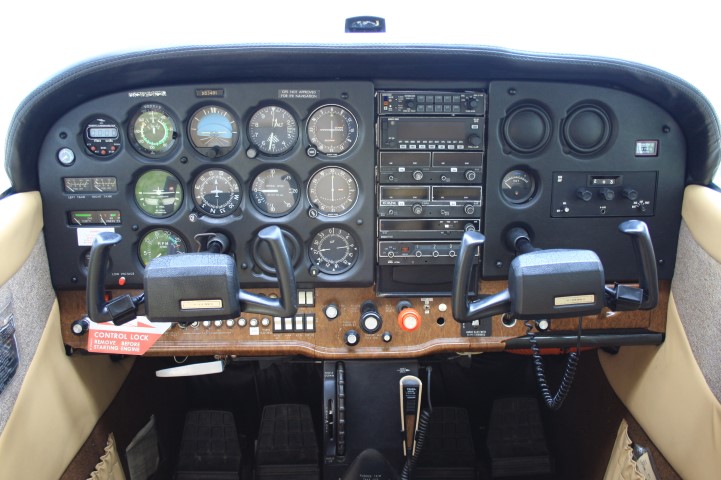
The next photo is one I took of the instrument panel of the Cirrus SR20 I flew to Cincinnati a couple of weeks ago:

All the same information that was shown on the various separate instruments in the Cessna are also shown on the Cirrus displays, but the Cirrus panel presents it in a whole new way and enhances it with navigation and traffic information, flight planning features, and more.
The Cirrus system (designed in partnership with Garmin and called “Perspective”) is really amazing. And remember that the plane I fly is 11 years old, so the newest versions are even better!
1 Like
New web site/blog for my RV-14 build 


Thought I’d share an update on my aircraft build, which is finally underway! In the past few months, I’ve done a lot of preparation, including organizing my garage into a workshop, acquiring the tools needed for the build, and constructing a work table and an accessory cart to hold a couple of large tools. Here’s a look at what I’ve been up to:


Everything in the shop (except for the bench grinder) is on casters, so it’s very easy to rearrange things to give me more room when I need it.


It’s a slow process at the beginning, because every operation is unfamiliar, so I spend a lot of time looking things up, watching videos, searching the Van’s Air Force forum, etc. But it’s also a LOT of fun, and the feeling of accomplishment when completing a step is great motivation to move on to the next one!
1 Like
Slow progress over the last few weeks as I spent a lot of time figuring out processes and setting up tools for the first time – but progress nonetheless! Here are a few pics:


1 Like
I’ve been working with a designer to develop a paint scheme for the plane, and I approved the final design about a week and a half ago. The designer provided 3-view drawings of the design, but I wanted to get a better idea of how the plane would look from various angles when you actually saw it on the ramp, so …

[ Modeled in SOLIDWORKS, rendered in KeyShot ]
1 Like
Here’s another render, this time in SOLIDWORKS Visualize 2020:

(I don’t own KeyShot and was using the free trial for the render in the previous post. I DO have a license for SOLIDWORKS, though, so I am trying to learn Visualize.)
1 Like

